Nothing beats the thrill of crossing the finish line in a triathlon, but a flat bike can throw a wrench in your plans. I’ve been there, feeling the panic as you realize you might not make it through the race.
Luckily, repairing a flat on your triathlon bike is simpler than you might think. In this guide, I’ll share easy steps to fix that pesky puncture quickly so you can get back to training and competing with confidence.
Understanding The Issue
Understanding flat tires helps me manage their impact on race performance and training. I identify common causes and contributing factors to prevent and quickly repair flats. Typical causes include:
- Punctures: Sharp objects, like glass shards or nails, penetrate the tire, leading to air loss.
- Pinch Flats: Low tire pressure causes the tire to compress against the rim, resulting in a flat.
- Valve Issues: Damaged or improperly fitted valves allow air to escape from the tire.
Key factors that increase flat risk:
- Terrain: Riding on rough surfaces raises the chance of encountering sharp debris.
- Tire Wear: Worn-out tires have less resistance against punctures and flats.
- Incorrect Inflation: Overinflated or underinflated tires make flats more likely.
Recognizing these elements enables me to take prompt action when flats occur, minimizing their effect on my training and competitions.
Tools And Materials Needed
- Spare Tube
Ensure it matches your bike’s tire size and valve type.
- Tire Levers
These help remove the tire from the rim efficiently.
- Pump or CO₂ Inflator
Use a reliable pump or a CO₂ inflator for quick inflation.
- Patch Kit
Carry patches and glue for minor tuber repairs.


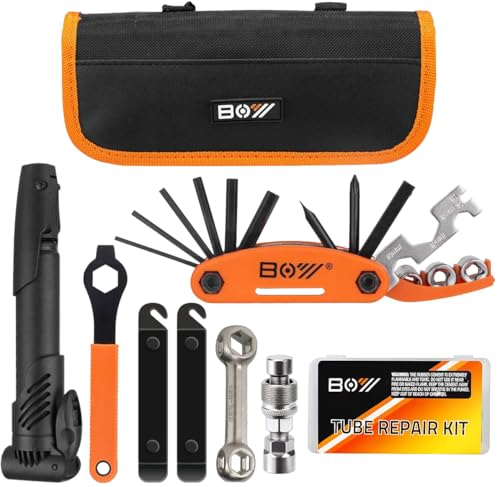

- Wrench or Multi-Tool
Useful for removing the wheel if necessary.
- Gloves
Protect your hands while handling tools and tires.
- Rag or Tire Boot
Prevent further damage to the tube during installation.
- Bike Repair Manual or Guide
Reference for step-by-step instructions if needed.
| Tool/Material | Purpose |
|---|---|
| Spare Tube | Replacement for the punctured tube |
| Tire Levers | Remove tire from rim |
| Pump or CO₂ Inflator | Inflate the tire after repair |
| Patch Kit | Fix small punctures on the tube |
| Wrench or Multi-Tool | Remove wheel or adjust bike components |
| Gloves | Protect hands during repair |
| Rag or Tire Boot | Shield the tube from sharp edges |
| Bike Repair Manual | Provide guidance for the repair process |
Step By Step Repair Guide
Fixing a flat tire is straightforward when you know the steps. I’ll walk you through each part to get you back on your triathlon bike quickly.
Removing The Wheel
Begin by shifting your bike to the smallest rear gear for easier wheel removal. Position the bike securely using a stable surface or a bike stand. Unlock the quick-release lever or use a wrench to loosen the axle nuts. Carefully lift the bike and pull the wheel out of the frame, ensuring the brake is disengaged if needed.
Patching Or Replacing The Tube
Start by removing the tire from the rim using tire levers. Inspect the tube for punctures by inflating it and listening for leaks or submerging it in water. Mark the damaged area and dry the tube thoroughly. If patching, apply the adhesive around the hole and press the patch firmly in place, waiting as recommended. Alternatively, replace the old tube with a new one that matches your tire size and valve type.
Reinstalling The Wheel
Place the patched or new tube inside the tire and seat the tire back onto the rim. Align the wheel with the bike frame, ensuring the brake pads are correctly positioned. Tighten the quick-release lever or secure the axle nuts firmly. Inflate the tire to the recommended pressure using a pump or CO₂ inflator. Spin the wheel to confirm it moves freely and that the brakes engage properly before riding again.
Preventing Future Flats
Maintaining optimal tire pressure minimizes flat risks. I regularly check my tires with a reliable gauge, ensuring they match the manufacturer’s recommended PSI.
Choosing quality tires enhances durability. I select tires with puncture-resistant layers and appropriate tread for my common terrains, such as road or gravel paths.
« Threshold Running Workouts for Triathletes: Boost Endurance and Speed
Best Carbs for Triathlon Energy: Top Choices to Boost Your Performance »
Installing tire liners provides an extra barrier against sharp objects. I use products like tire boot or puncture-resistant strips to add protection without compromising performance.
Avoiding debris reduces the chance of punctures. I stay vigilant on my routes, steering clear of broken glass, thorns, and other sharp debris that can damage tires.
Regular tire inspections detect wear early. I examine my tires for cuts, embedded objects, and excessive wear, replacing them when signs of damage appear.
Proper bike storage prevents tire deformation. I store my bike in a cool, dry place, keeping tires off the ground or using a bike stand to maintain their shape.
Using the correct wheel size ensures compatibility and reduces flat risks. I verify that my tires match my bike’s wheel size, preventing issues like pinch flats caused by mismatched dimensions.
| Prevention Method | Frequency | Tools Needed |
|---|---|---|
| Check tire pressure | Before every ride | Tire gauge |
| Inspect tire condition | Weekly | Visual inspection |
| Clean and maintain tires | After rides on rough terrain | Clean cloth, mild cleaner |
| Replace worn-out tires | As needed based on wear | New tires |
| Install puncture-resistant liners | When replacing tires | Tire liners |
Implementing these strategies keeps my triathlon bike performing smoothly, reducing the likelihood of flats and ensuring consistent training and race performance.
When To Seek Professional Help
Recognizing when I need professional assistance keeps my bike in top condition.
- Persistent Flats: If I experience frequent flats, it may signal underlying issues that require expert diagnosis.
- Rim Damage: When I notice bends or cracks in the rim, I consult a professional to maintain my bike’s integrity.
- Valve Problems: Struggling with valve leaks or replacements often leads me to seek specialized help.
- Lack of Tools or Experience: Without the necessary tools or confidence, I rely on a mechanic to handle the repair.
- Time Constraints: Facing an upcoming race and unable to fix the flat quickly, I seek professional support to stay on track.
Conclusion
Facing a flat during a triathlon might feel daunting, but knowing how to handle it gives me peace of mind. Keeping my tools handy and understanding the repair process means I’m always prepared to get back on track quickly. Taking preventive steps also helps me enjoy my training and races without unexpected interruptions. Whether I’m out for a tough training session or competing in a big event, knowing I can fix a flat keeps my focus where it should be. Staying prepared not only boosts my confidence but also ensures I keep pushing towards my triathlon goals smoothly.


